
User guide
- Navigation
- Requesting a Site
- How to Log in
- The System in a Nutshell
- Understanding the Homepage
- Automated Pages [Leadership, Membership, & Events]
- Content Types and permission Levels
- How to Post Content
- Entity site Pages
- Link and button styles
- Events & Announcements
- Newsletters
- Photo Galleries
- Web Videos
- Images & Files
- Deleting Content
- Embedding Paypal in Events
- Quote and Promo Breaker Panes
Navigation
For more information on creating site navigation items, click here.
Requesting a Site
Before you get started, make sure you have a site to work on! If you're reading this page, it's likely that you have requested a site already. In order to request a site, you'll need to make yourself familiar with what a entity site is and what's not supported. Also before requesting a site, you should make sure you're the person who will be managing the entity site (or you know who that person is). You should have your member number ready as well.
How to sign in to edit
- Go to AIChE.org/user/login
- Sign in with your member credentials
- Type or paste your web address into the browser you're signed into (e.g. https://www.aiche.org/community/sites/local-sections/st-louis or https://www.aiche.org/community/sites/divisions/fuels-and-petrochemicals
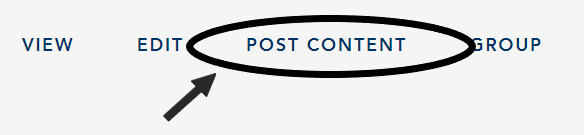
- Click edit or post content
The System in a Nutshell
AIChE Entity Sites can be employed by any entity related to AIChE (divisions, forums, committees, local sections, and others) to come together, share files, make announcements, and more. If you've used previous AIChE content management systems, it's important to know that this one is different in some key ways. Three of the most important differences (that make your life easier) are:
- The homepage shows a feed of recent activity on the site (announcements, events, blogs, and more)
- Leaders and members show up automatically on the respective Leadership and Members pages. The data is pulled in from the AIChE database.
- Events are automatically archived to recent events and announcements expire based on the date you choose
Home Page
The home page of your site is built on a panel system. The panel has multiple panes that display information about your entity. Some of the panes can be customized by you and some new ones can be added.
Elements of the home page
Navigation
The horizontal navigation can have 5 parent items and multiple children under each parent. Learn more about navigation. It also contains your acronym, entity name, and access to the overall AIChE navigation system and sign in.

Hero Pane
The hero pane contains the name of your entity, your welcome message, and optional CTA (call-to-action) links, which can direct the user to a specific page. It also shows a background image related to your entity.
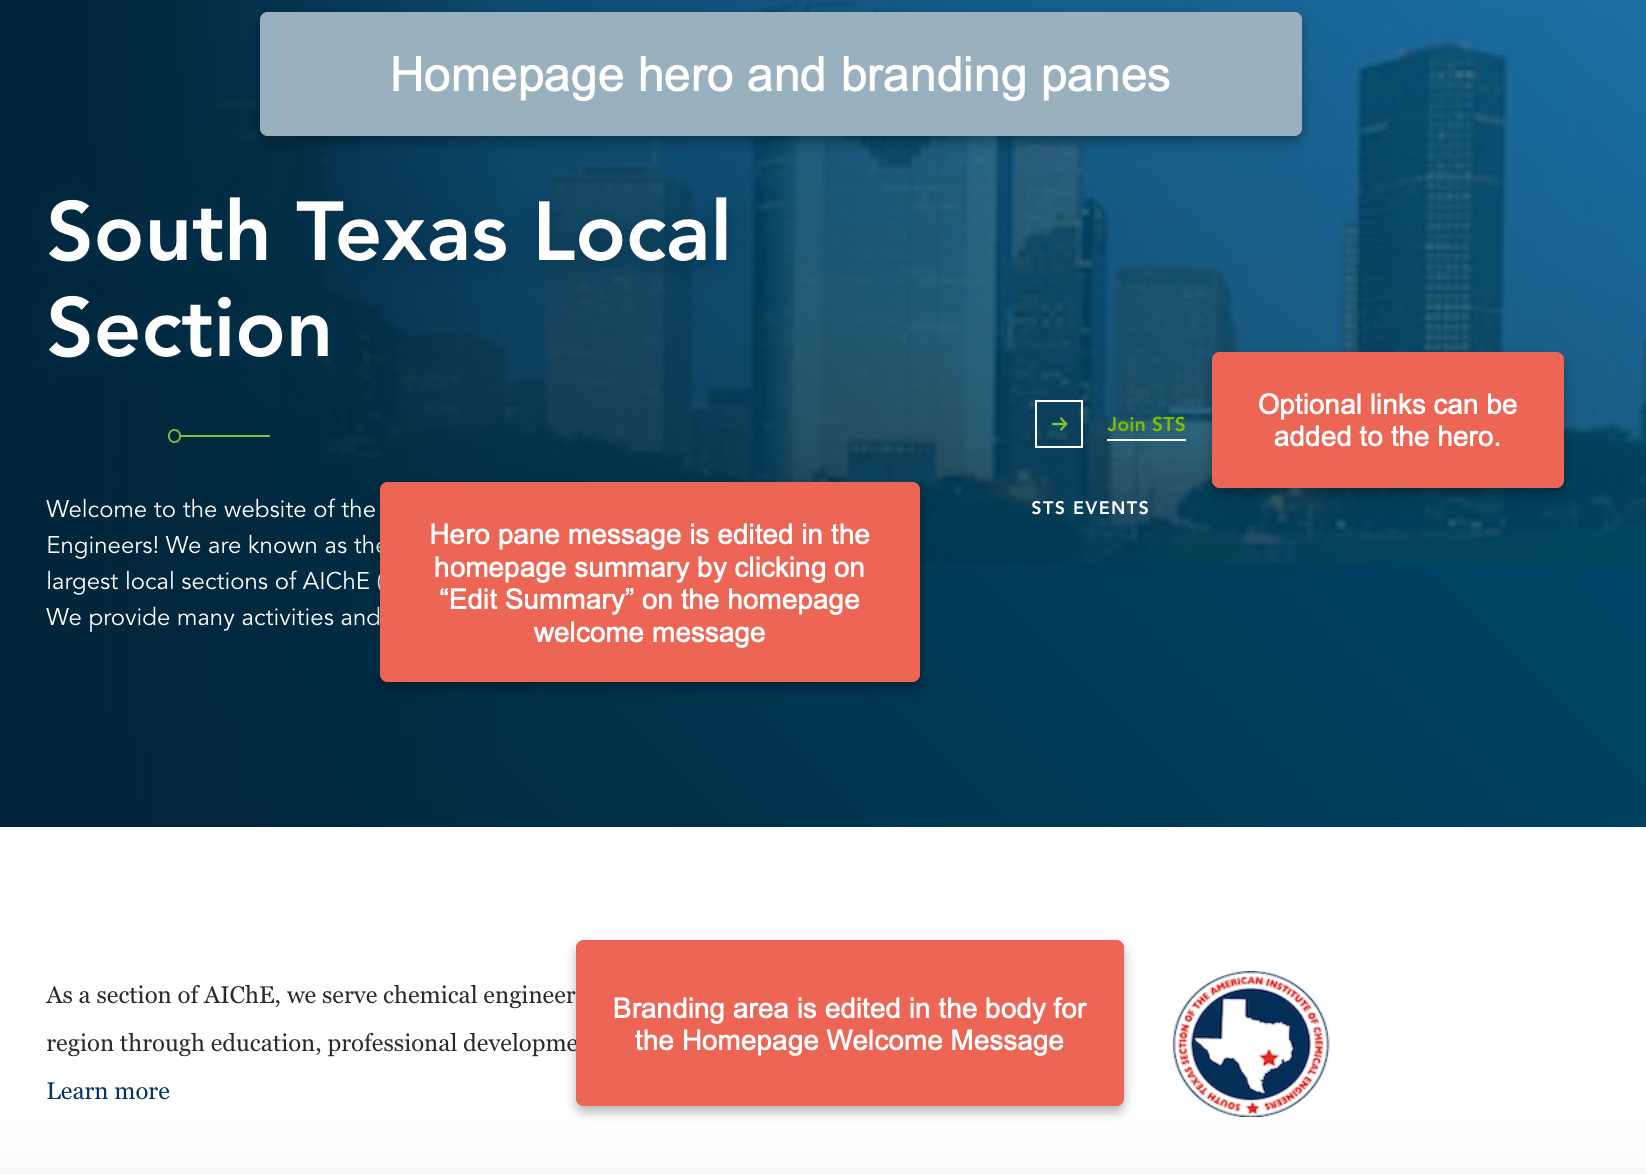
Branding Pane
The branding pane contains an additional sentence or two about your entity, an optional link to your about page, and your entity logo.
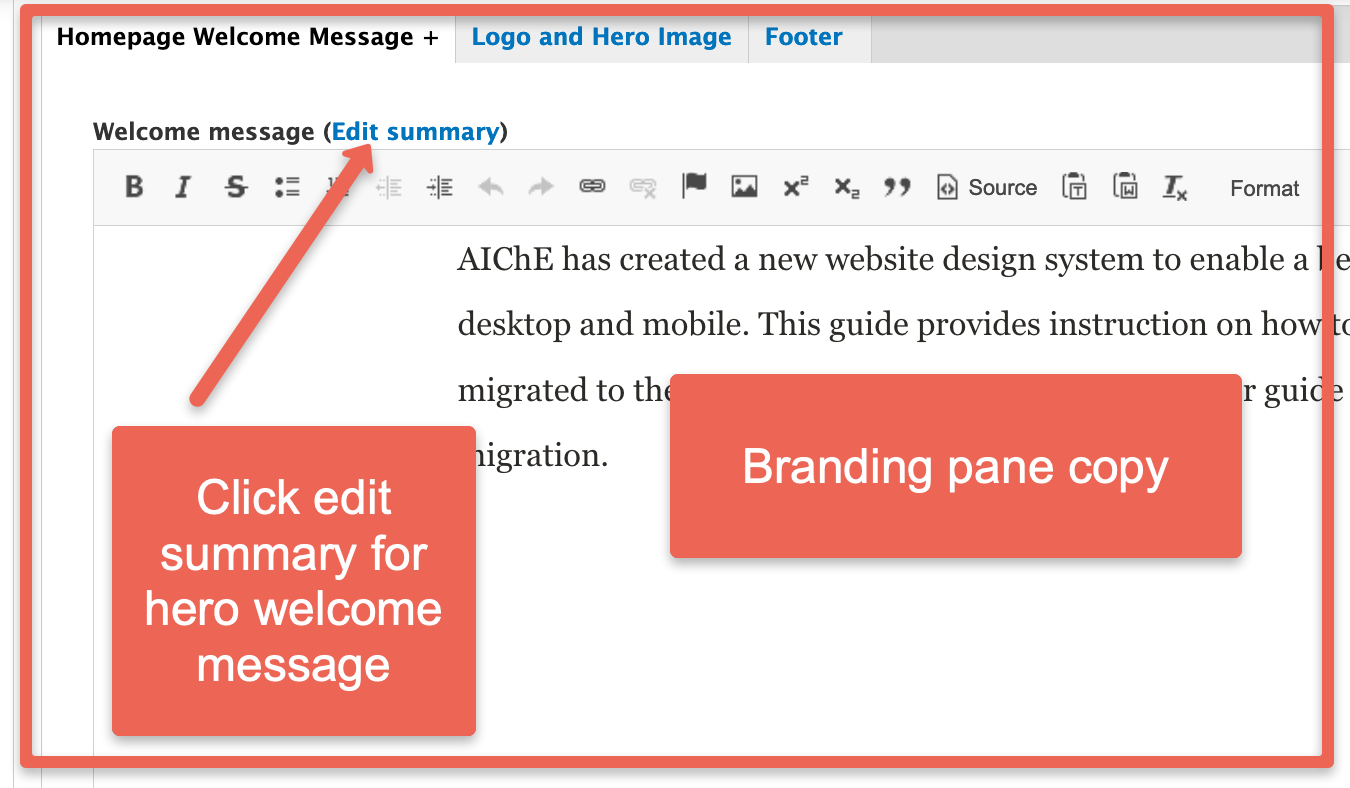
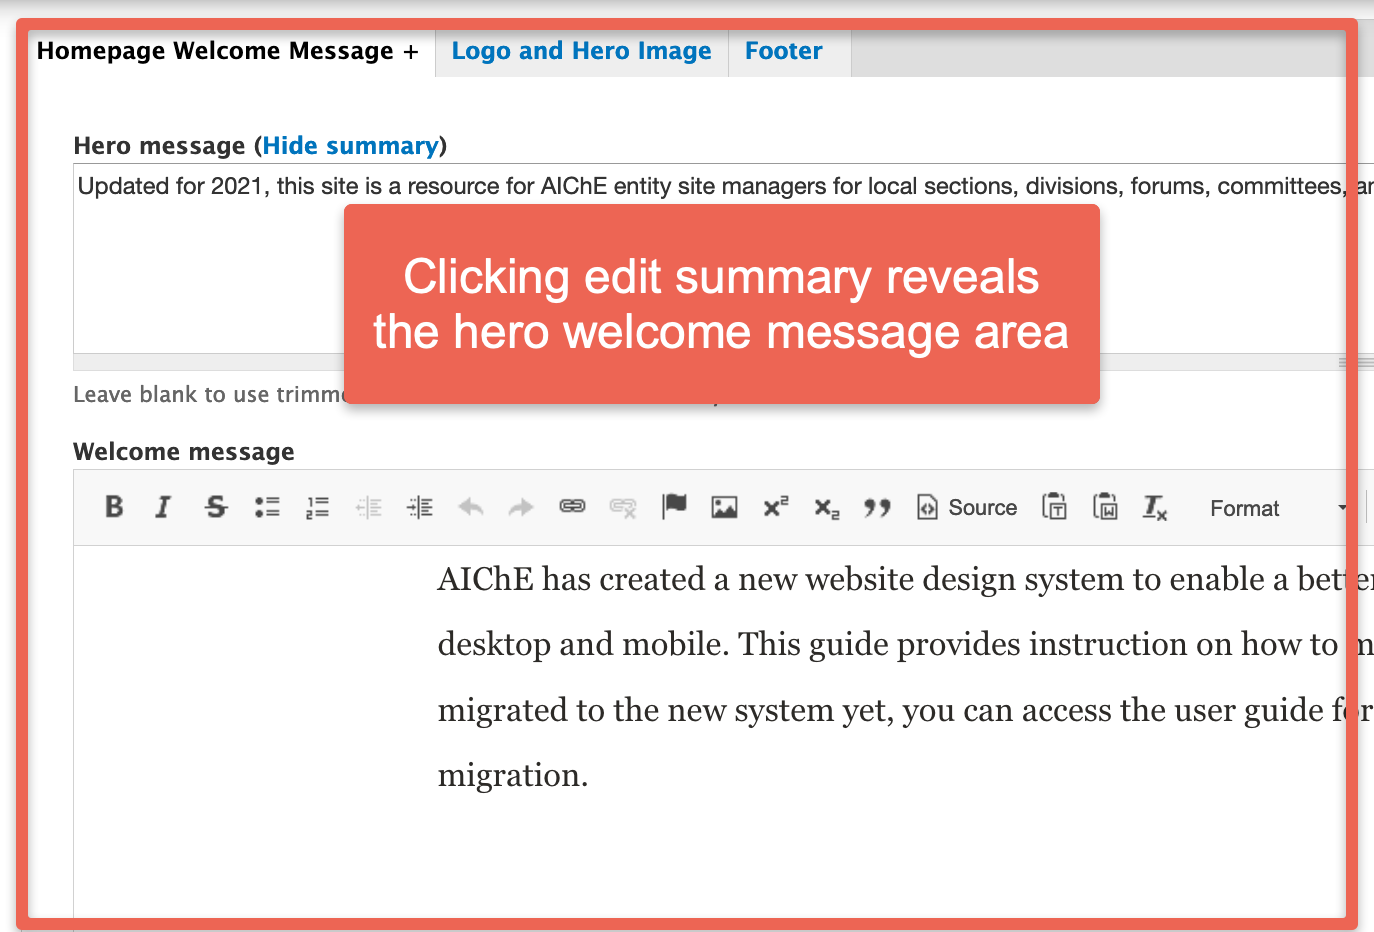
The hero pane and the branding pane work together and are edited in the same place
List Panes
Depending on your site’s content, the homepage will show panes that contain the following lists.
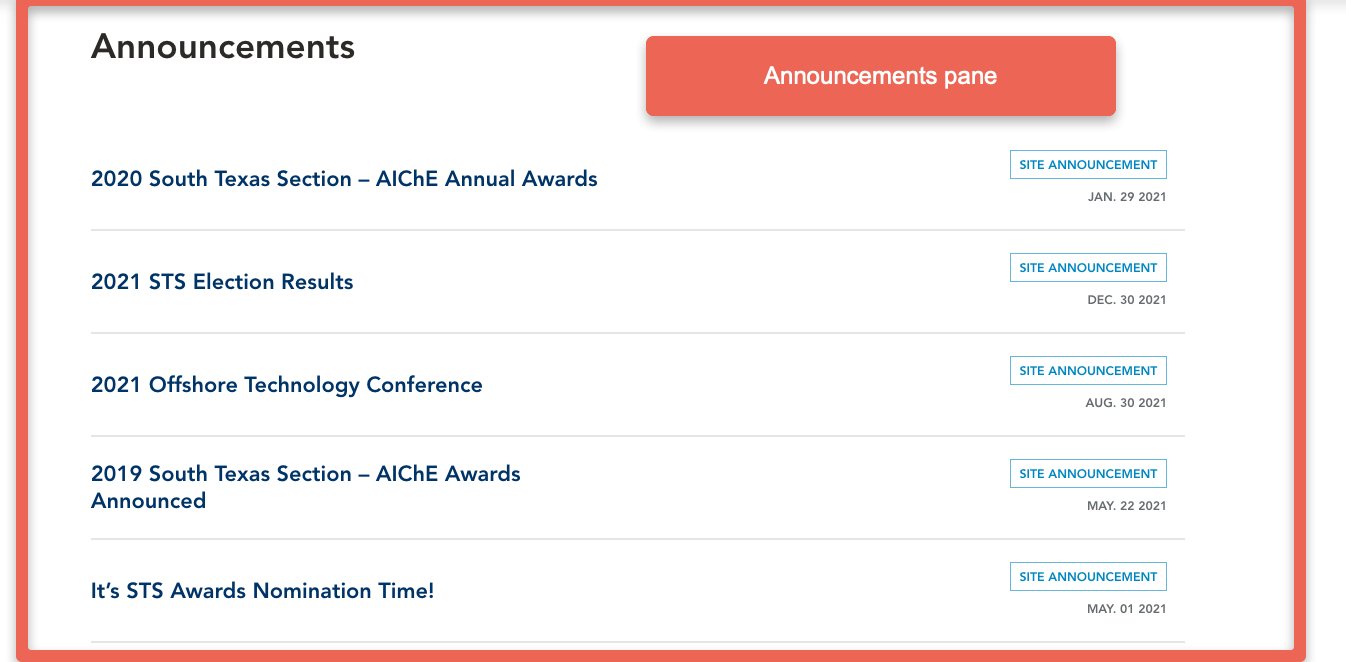
Announcements - the title of each announcement and the date it was posted are shown in a list.
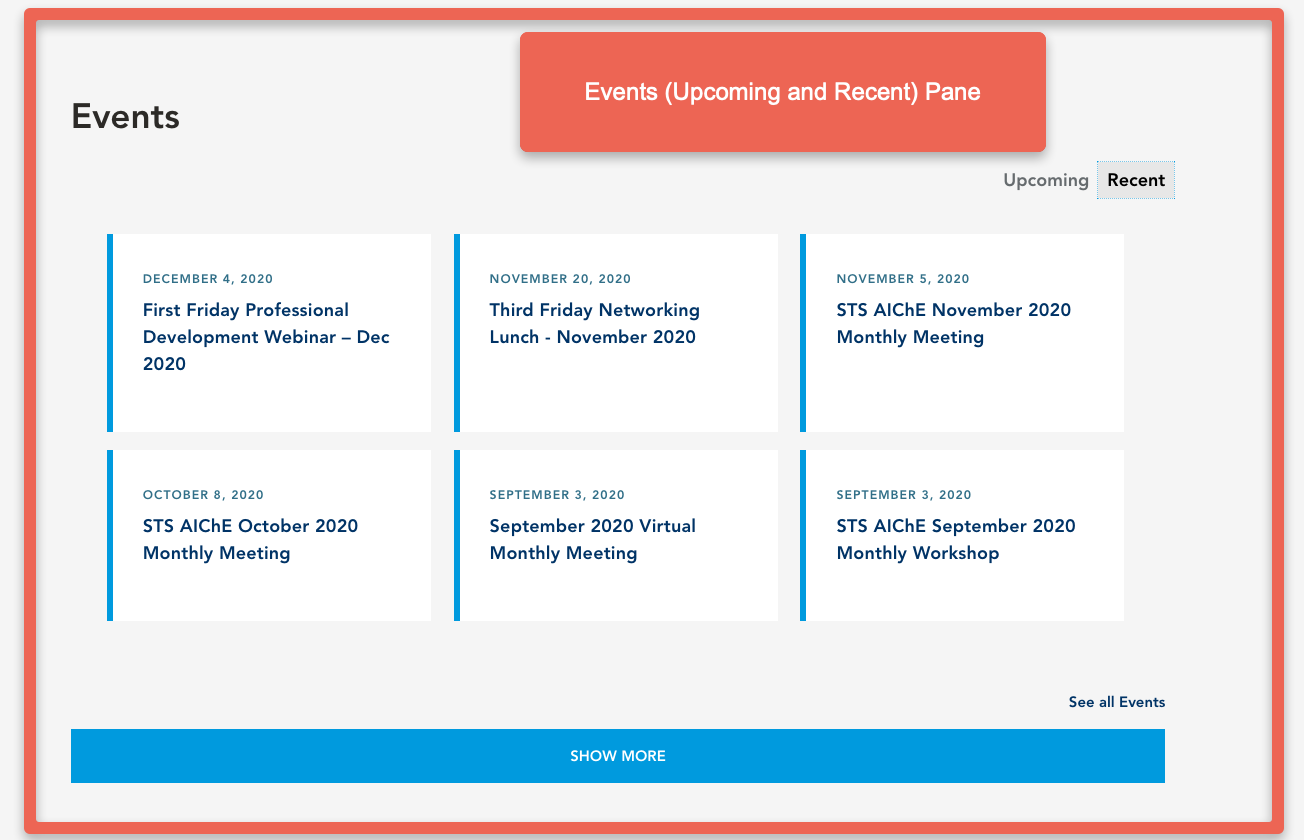
Events - Upcoming and recent events are shown in a tabbed list of cards
Recent Activity - Blog posts, newsletter posts, slideshow posts, and video posts are shown in a list with a label identifying their type
Each title links to the announcement. If you do not have a particular type of content, the pane will not show
Automated Pages
Leadership, membership, and event pages are pages that are generated automatically. Here's how they work:
- Leadership Page- Officers of local sections, division, forums, or committees are managed at the database level. If you have a change of officer, you need to communicate it to your AIChE staff liaison. You should encourage all officers of your entity site to update their profiles. Note that the only part of this page you can update is the intro copy (optional). Example
- Membership Page - Members of your entity site appear on the membership page and are also managed at the database level. You should encourage all of your members to keep their profile complete with a bio and a photo. If they are not listed here, they should contact customer service to correct their record. Example
- Events Page - Three upcoming and 2 recent events will show up on the homepage feed. A full list of events is displayed on the events page. In order to for events to appear, they have to be added as individual events. Note that past events will automatically archive and be shown under the heading "Past Events." Example
Other pages that are automated include Awards (only for AIChE-recognized divisions, forums, and committees), Videos (only for local sections, divisions, or forums who have produced them).
Content Types & Permission Levels
AIChE Entity Site Managers Only
The majority of content types can be created and edited only by the Entity Site Manager/Site Maintainer. If you are reading this page, you likely have access to these content types. If you need to add an additional Entity Site Manager/Site Maintainer for your entity, e-mail your AIChE staff liaison with their name, e-mail, and member number. Make sure you mention the site they need access to.
- Web page
- Site navigation link
- Event
- Site announcement
- Web-based form
- Newsletter
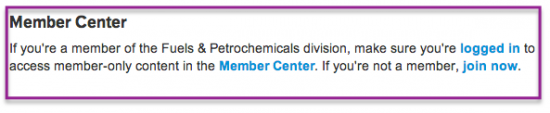
Creating Members Only Content
Make any page visible to Members Only
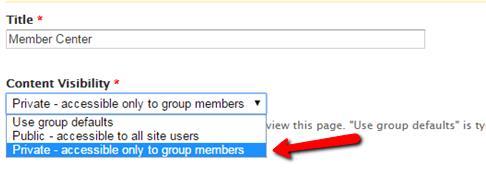
When creating a new webpage on your community site, you are given a choice of public or private visibility under the Content Visibility section.
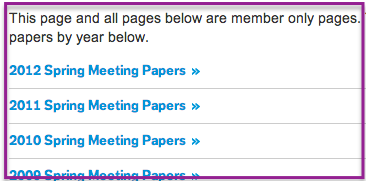
To create a webpage that can only be viewed by members, select private. This will mean that only logged in members will have access to the contents of your page.

How to Post Content
To post content, click the Post Content button below the left navigation. Note that if you don't see this button, you are not a member or site maintainer.
Entity Site Pages
Wysiwyg Editor + Copy/Paste
Before we get started learning how to add new content, it's important to mention one very important thing. The body sections of any content type requires that you style the content you enter to make it look its best. You do this using the editor, which looks similar to Microsoft Word. However, it is NOT the same. You can learn more about proper styling later but the most important points to remember are:
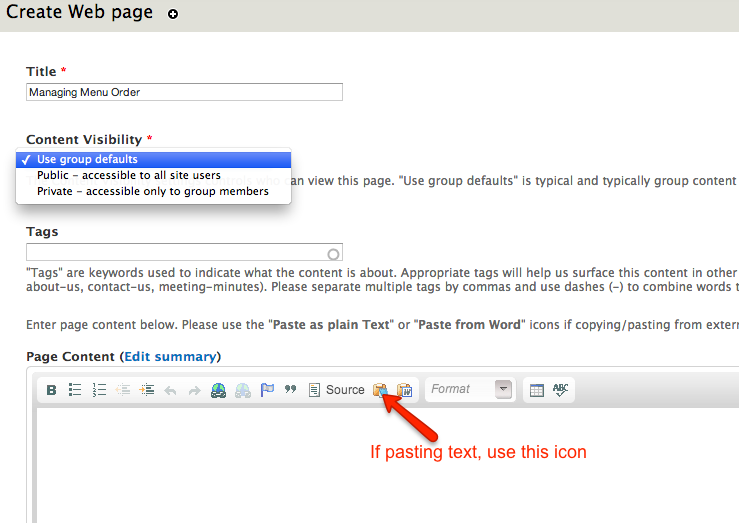
When copying and pasting from elsewhere, always:
- Paste using the text icon

- Remove all formatting like bullet points, etc before pasting. If you want bullet points, you can then reset them using the editor.
Creating & Editing Content
Below you'll find information on how to create most content. This guide is a work in progress so check back regularly as we update it and add new instruction.
Make sure you read the information above on the Wysiwyg Editor + Copy/Paste.
You can access content that is part of your site to edit it in 2 ways.
1) From the Content
Click the EDIT button at the top of the page of the content itself.

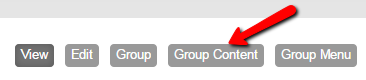
2) From Content List
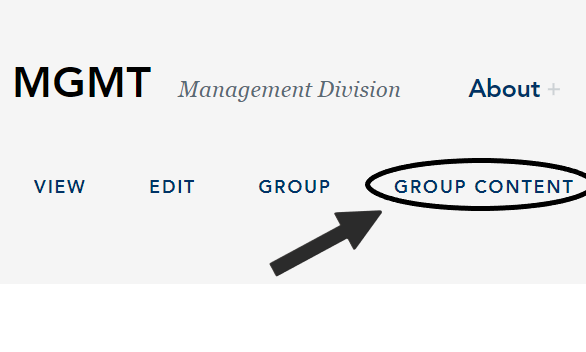
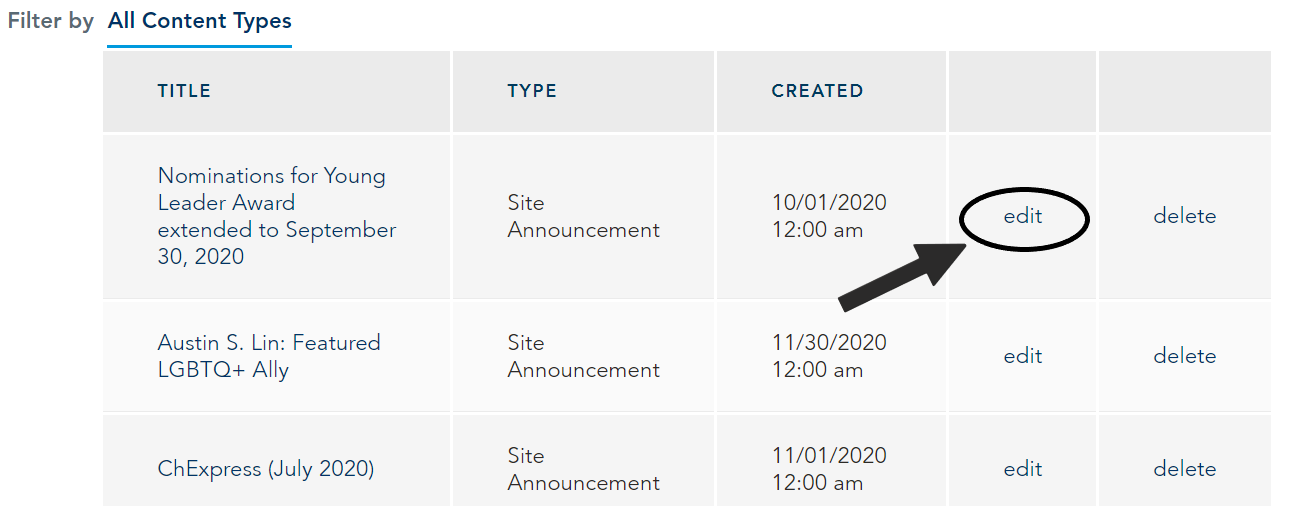
Navigate to the home page, click on Group Content, and then you will see a list of all of your site content. Clicking on a link will bring you to the content where you can then click on the edit button to edit it. See the image below for visual reference. *update images*
Creating a Web Page
The Web Page content type is what you'll use to show your static content, like about page, resources/useful links. It should be used judiciously as it does not appear on the homepage feed. Consider using Site Announcement or AIChE Entity Site Event. If you are going to create a webpage and you want it to link to it from the navigation, you need to create a navigation link separately.
- Click on Post Content
You'll find this below the navigation on your site, on any page.
- Click on Web page

Complete Fields
Once you click on the web page content type, add content to the following fields:
- Title - This appears at the top of the content.
- Content Visibility - The default setting is public, which is desired most of the time, especially if you have a navigational link. If you want the content to be seen only be members of your entity site, select Private - accessible only to Group Members.
- Tags (optional) - Adding tags to content may allow for the content to be accessed via tag at a later date. It's a way of organizing content by label.
- Page Content - This is where the bulk of your content will be added. You can type directly into the field (recommended) or paste using the text paste icon.
- Images & Files (optional) - You can add images and files to a page as well.
Anatomy of Adding a Web Page
Click on the image below to see what you'll see when creating a new web page.
- Click Save
Click the save button at the end to save the content.
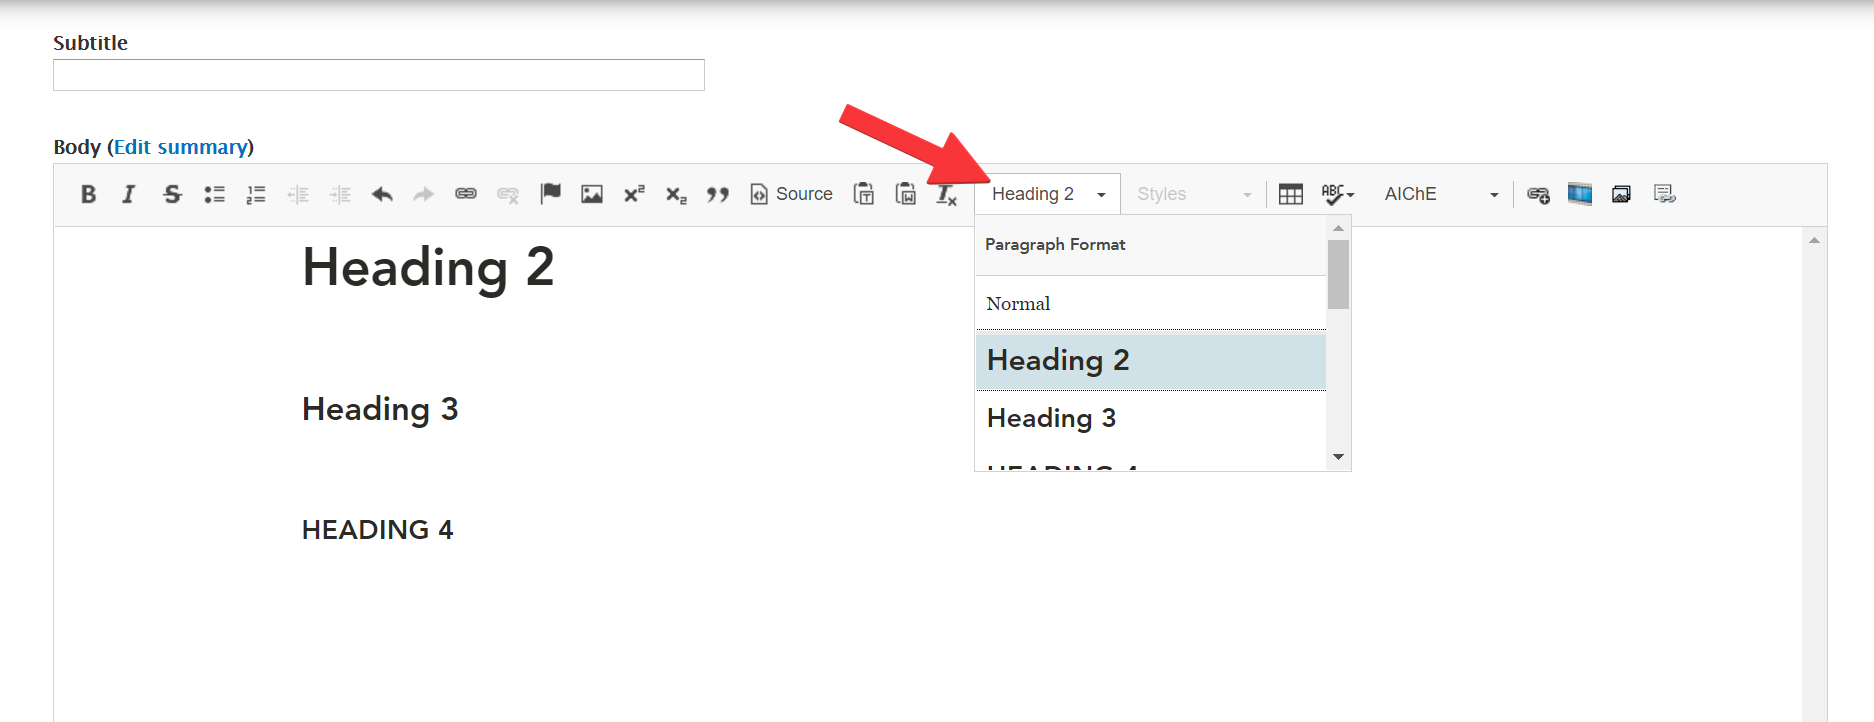
Headings
Headings are important for search engines to recognize page structure and determine what’s on the page. They are also useful for separating sections of the page. It’s important to use headings <h2>, <h3>, <h4> and NOT simply bolding or capitalizing for a heading. View the image below for an example on how to add headings to your text.
Styling Links
CTA (call-to-action) links
A CTA list is a call to action list that includes 3 or more links. Each link goes to a specific area of the page. The first link is the most important and appears as a button. Watch the video below for more details.
CTA link styles
Plain links within text look like this. However, there are several styles you can apply to links. Here is what they look like:
The following CTA style is a button (outline white arrow). This can only be used with a dark background. Otherwise, the button style won't show up.

Please watch the video below for more details:
Events & Announcements
What Makes Events & Announcements Different?
Events Once one event is created, an event listing page is automatically created along with a menu navigational link. This page will show all upcoming events and below those, past events. Once an event passes, it will shift on this listing page from upcoming to past. See example
You don't have to do anything as it is all based on the event date.
Announcements Did one of your members recently receive an award that you want to shout out on the site? Did your officers change? You can create an announcement. When you create one, it will stay live on the site for 60 days and appear on the home page feed. If you'd like it to appear for a longer time (or shorter time), you can adjust this!
Creating an Event
To create an event, click on Post Content and then Event (community).

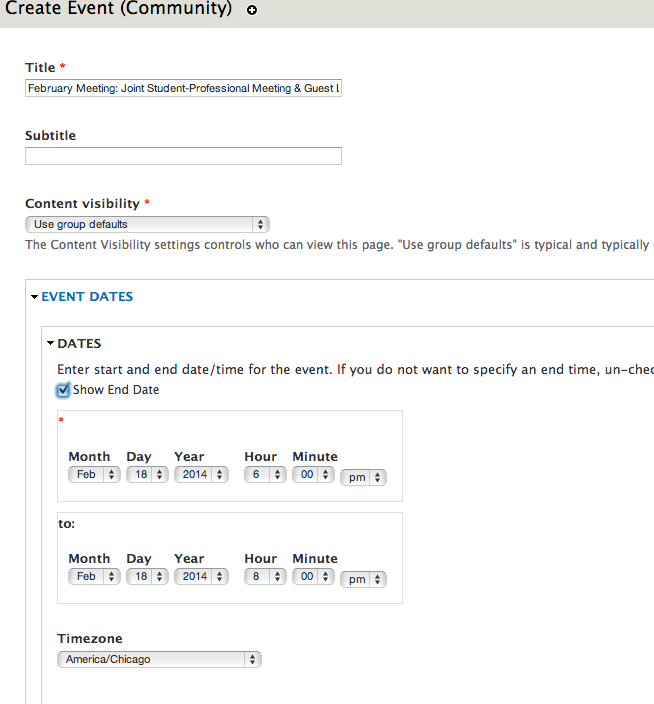
Complete Fields
Once you click on the web page content type, add content to the following fields:
- Title - This appears at the top of the content.
- Subtitle - (optional)
- Content Visibility - The default setting is public, which is desired most of the time, especially if you have a navigational link. If you want the content to be seen only be members of your community, select Private - accessible only to Group Members.
- Event Dates - Currently, you must put in a time. We are working on a solution where you can announce an event and add specific times later. If you're not sure of the exact times of the event, uncheck the "Show End Date" box. You choose an approximate starting time and mention that times are tentative. Ideally, you will have the exact start and end time before adding an event. Note, you may choose to add an announcement if you know only the date and not the time.
- Event Format & Location - Is your event an in-person event or virtual. You can add location and links here.
In-person event detail
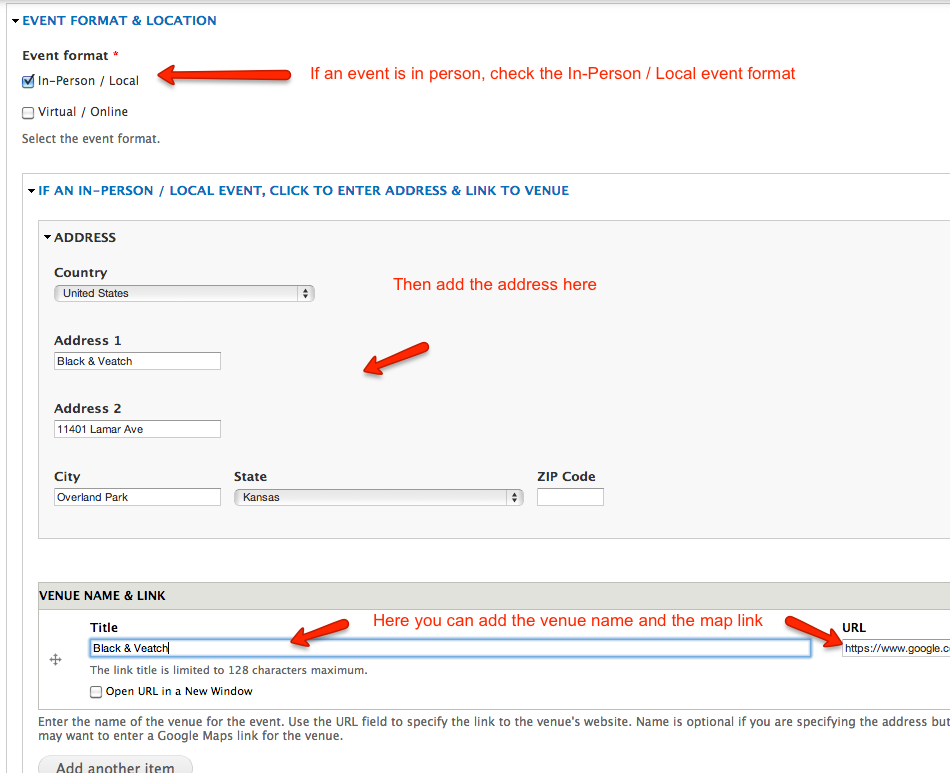
Virtual event detail

- Related Profiles - (optional) You can reference the profile of a presenter, speaker, or organizer as long as they are an AIChE member. We encourage you to use this feature and ask profile owners to complete their profiles.

- Event Description - This is where the bulk of your content will be added. You can type directly into the field (recommended) or paste using the text paste icon. Review style guide for best results
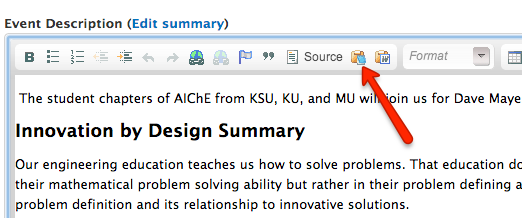
- Images & Files - (optional) - You can add images and files to an event as well. Learn how
- Tags - (optional)
Click save to publish the event.
Need to embed Paypal code in an event?
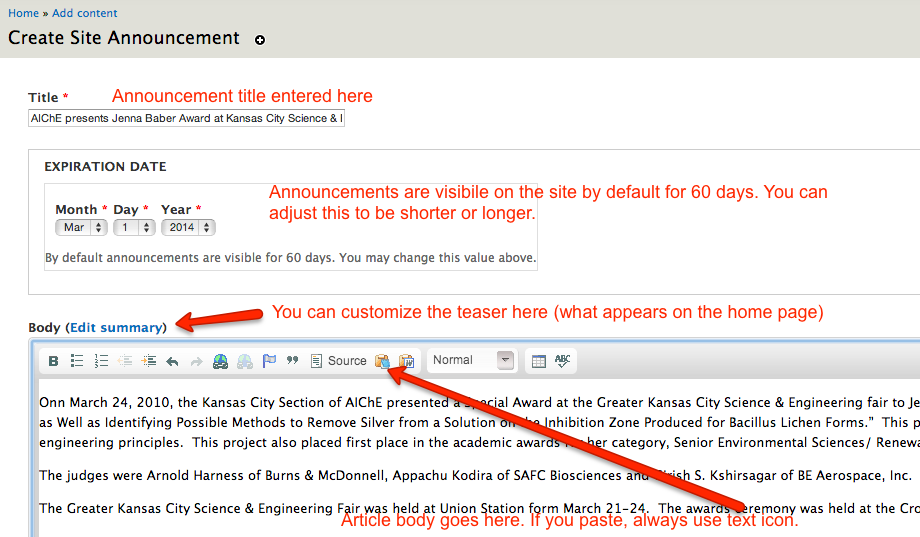
Creating an Announcement
To create a site announcement, click on Post Content and then Create Site Announcement.

Once in, add the title in the title field and the announcement itself in the body field. Announcements stay visibile on the site for 60 days by default. They will then be in the system but not visibile. You can always change the visibility date to be longer or shorter. Once you've added the title, visibility date, and body of announcement, click save. The announcement will then appear on the home page feed. Click the image below to learn more.
Newsletters
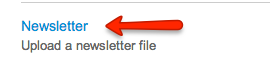
Newsletters can be uploaded as pdfs. If your newsletter is in a different format, you should save it or print it as a pdf. Once you have the pdf, click on Post Content and then on Newsletter.
Newsletter has 3 mandatory fields:
After you've uploaded the PDF file, make sure you add text description. If you don't, the file name will show. Click on the image below to learn more.
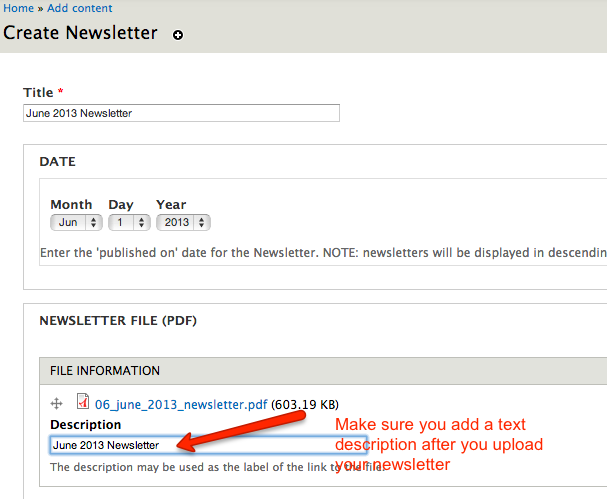
After you've completed all fields, click save.
Newsletter Navigation Link
Note that once you upload your first newsletter, a navigation link will be created on the left side of your site. This will link to a reverse chronological list of your linked newsletters. See example
- Title (Often the month and year of the newsletter, but could be different)
- Date published
- PDF File
Photo Galleries
You can create slideshow photo galleries* on your site easily. Click on Post Content and then Photo Gallery.

Fields
The photo gallery content type consists of 3 fields, 2 of which our mandatory.
- Title (of the gallery)
- Description (of the gallery) (optional)
- Photos (you upload them one after the next)
Click on the image below to see detail of fields.

Once you've added all of the images you'd like to show in the slideshow, click save. Note that you can go back into the gallery/slideshow and add additional photos if you'd like.
*Note that you can create multiple slideshows of different events. Every photo gallery created will be listed under the same navigation link.
Web Videos
A web video is a video that is hosted on Youtube that you'd like to feature in your site. To create a web video, click on Post Content and then Web Video.
Complete Fields
Title - This appears at the top of the page and on the list page
Body - This is where you add a paragraph of copy describing the video
Video Shoot Date - This is the date the video was shot. If you don't know this date, you can select today's date. Click off Show End Date as only one date is needed.
Video Url - This is the place where you would paste the Youtube video url. Note: make sure Youtube is selected as the Video Provider. In rare cases, where AIChE hosts the video, you would select Limelight HTTP.

Save Content
Click Save.
Images & Files
The AIChE Community Site system allow you to add images and files to most content types. There are also separate content types devoted to images or files. To add images and files to web pages, blog posts, announcements, etc., follow the instructions below.
Adding Images
Upload Image
First you need to upload the image where it says Referenced Images by choosing the file and then selecting upload.

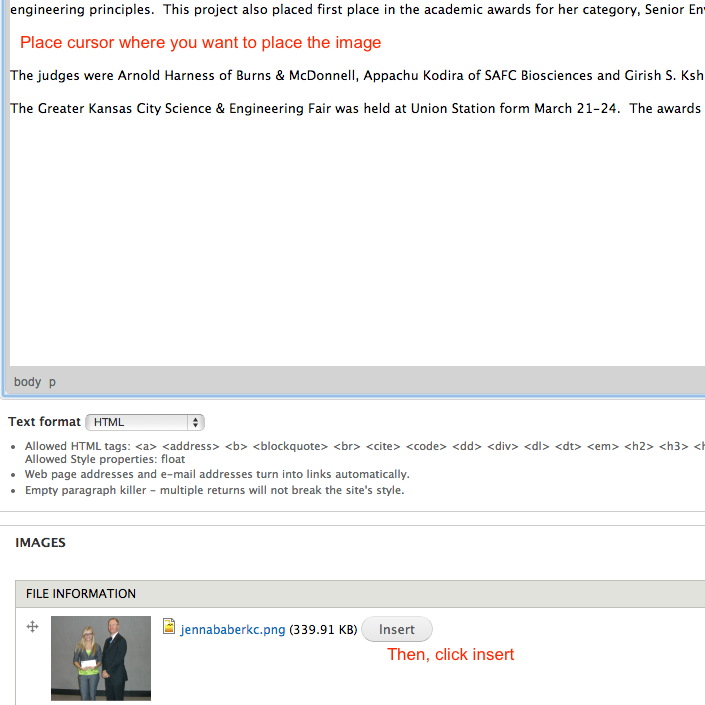
Insert Image
Then, after the image is uploaded. Place your cursor where you want the image to display. Then, click the insert button. Click on the image below to see detail.
Change Image Display Size
The web department personally thinks large images taking up the full width look better and have more impact but if you want to, you can change the the way an image is displayed. After the image is inserted in the body, right click on the image and select image properties. You can change the display of the image here. By altering the width and height. Note that you need to make sure the aspect ratio is locked (by making sure the lock is closed) so the image doesn't distort. If you mess up, you can always delete and re-insert the image. View the the image below for more details.

Watch the video below for a step by step example:
Adding Files
You may occasionally need to add file downloads to your site. Permissable file types are txt, pdf, ppt, pptx, doc, docx, xls, xlsx, and zip. The most common are pdf and word documents. The web department encourages you to use .doc, .xls, and .ppt file names rather than .xls, .xlsx, and .pptx. There have been reports of Internet Explorer users having problems downloading the newer microsoft files types.
Upload the File
First you need to upload the file where it says Referenced Files. Make sure that the file name has no spaces in it.

Add "Friendly Text"
Add friendly text for the file link so the file name will not appear.

Choose Where to Place the File Link
You have 3 choices of where to position the file link.
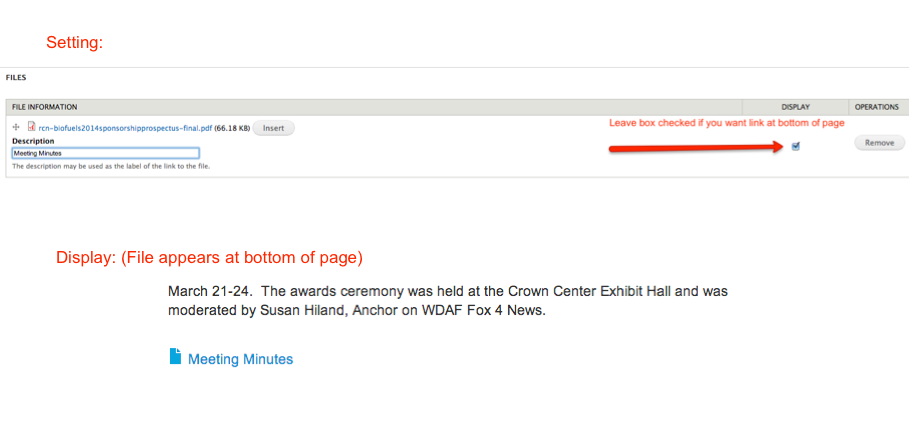
Bottom of Page
Simply make sure the display check box is clicked on. The file will diplay at the bottom of the page. Click image to see detail.
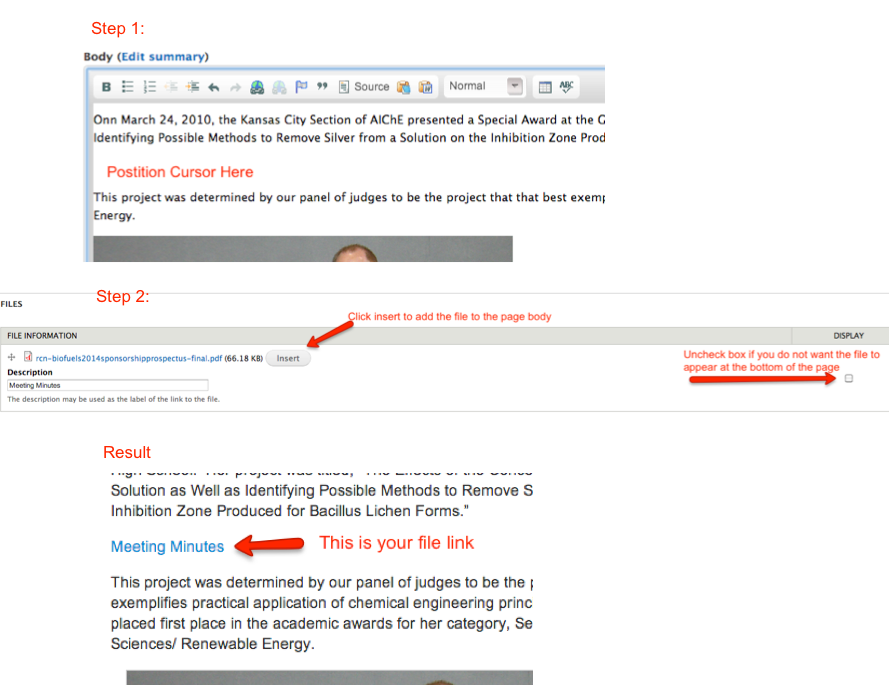
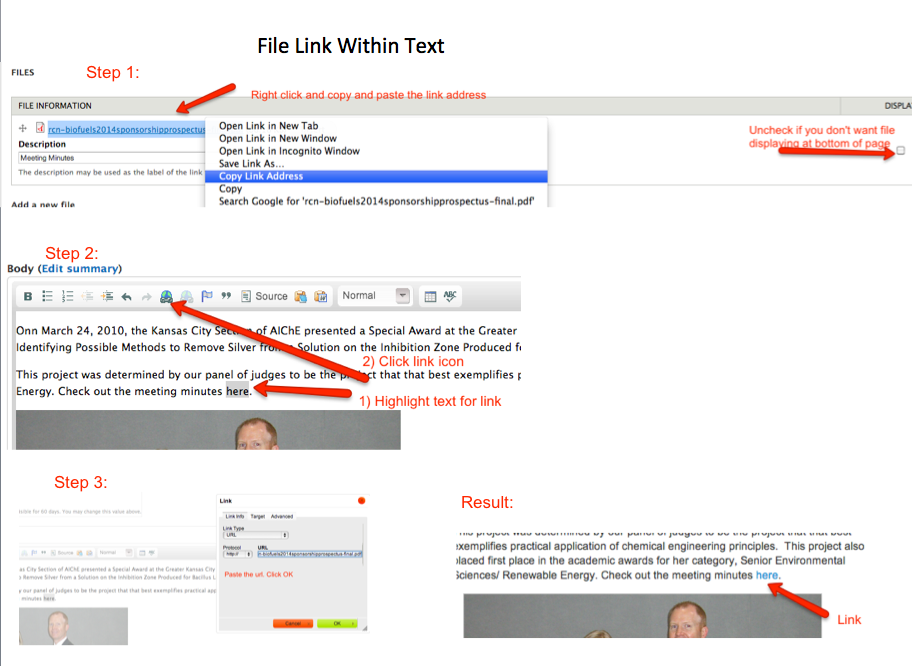
Within Copy Body
Position your cursor where you want the file link to appear. Then click insert. Your file link text will appear in that position with the text you entered in the description. Click image to see detail.
From text Already in Copy
Link to specific text within your paragraph or copy. To do this, right click on the file. Then highlight the text you would like to link to the file. Finally, click the link icon and place the link in it. Click image to see detail.
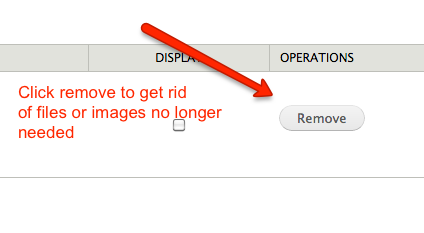
Remove an Image or File
If you no longer want an image or file in the system, you can remove it. Click image to see detail.
Deleting Content
To delete content:
- Go to the home page of your community site.
- Click “Group Content”:
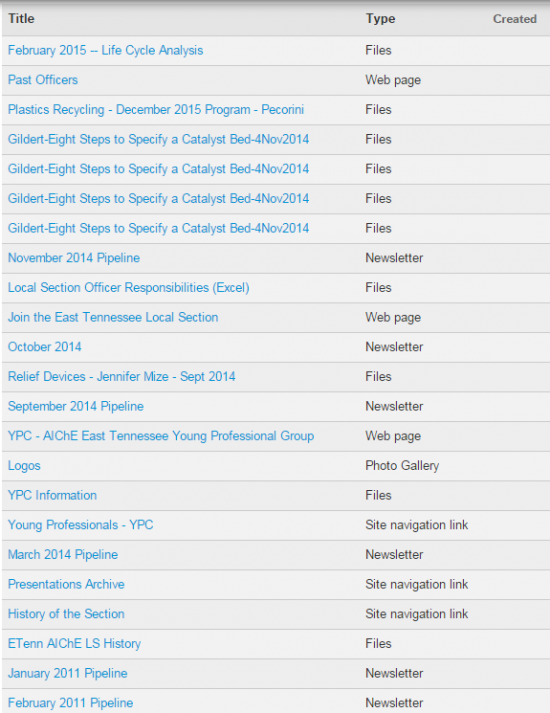
- From this menu, you have a listing of all content within your community site:
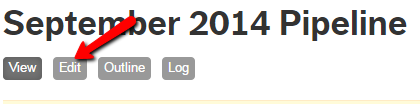
- Click the title you wish to delete, then click “Edit”:
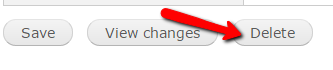
- Scroll to the bottom of the page and click “Delete”:
Tips
- Remember that once you delete content from your site, it is gone forever!
- If you delete a webpage with a site navigation link in the left menu, be sure to go back into the Group Content menu and delete the “site navigation link” type as well.
- Be sure to remove any hyperlinks to content you plan to delete on your site.
Embedding Paypal in Events
Some communities charge for their events and use Paypal to process their event charges. If you'd like to do this, you'll need to first set your entity Paypal account up.
Once you do that and set up your event as one that can be paid through the service, you can link to Paypal from your community event page. You can also embed the code on the community event page.
Embedding Paypal Ecommerce Code
Embedding Paypal Ecommerce Code will result in your event looking similar to this one from the Kansas City Local Section. Cick on it to make it larger.

To embed the code there are a couple of steps:
- Grab the code from Paypal after creating the event and...
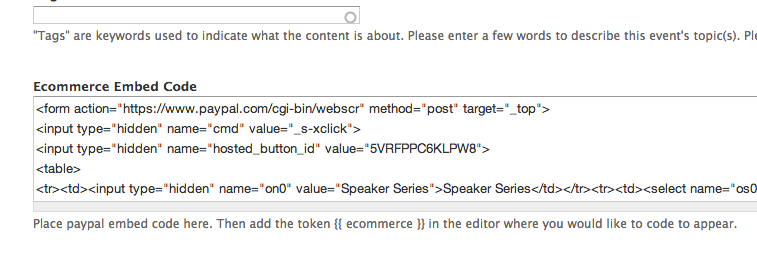
- Insert the coe in the Ecommerce Embed field and...
- Insert in the Event description where you want it to go
Pasting code in Embed field
The field is directly below images and files.
Adding in Event Description
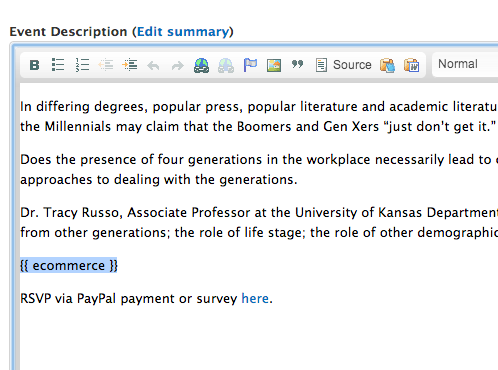
After you've done the above, save your event and you will see that people can pay directly on the page rather than on Paypal.
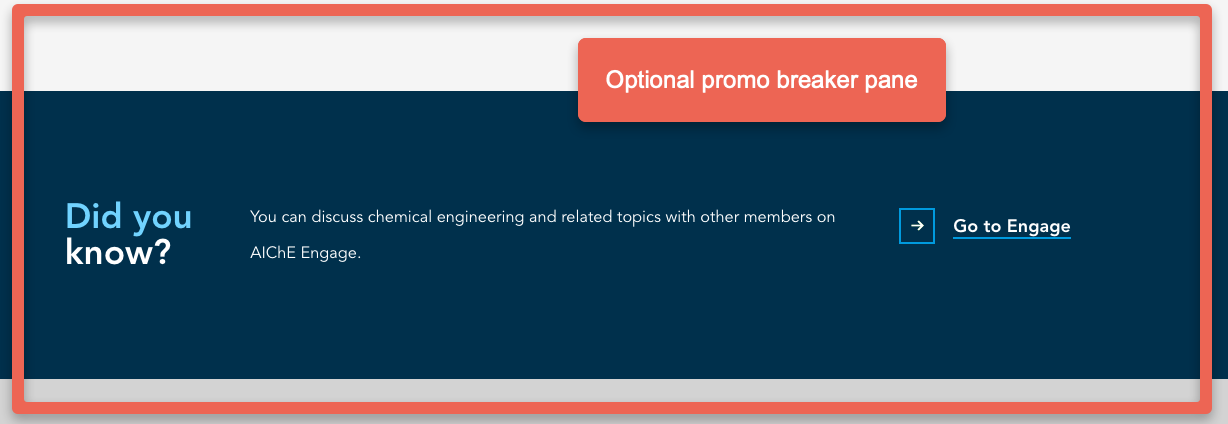
Promo Breaker Pane (optional)
Note: this is not available as of 1/5/2021
By default, we will show a pane for AIChE’s online discussion community, Engage. However, you can either change the content of this promo breaker or add a new one. Please note that you can only add a promo breaker on your home page.
Watch the video below for more details:
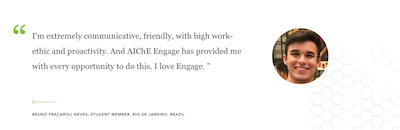
Quote Breaker Panes (optional)
Do you have a quote of someone sharing a testimonial about your AIChE division, forum, or local section? If you have a short, quote of 30 words or less and an image, you can add it. Please note that you can only add a quote breaker on your home page.
Watch the video below for more details:
- Log in to post comments